Other funtions
Reference video:
Firmware Update (obtain the latest firmware in the software installation and driver first)
-
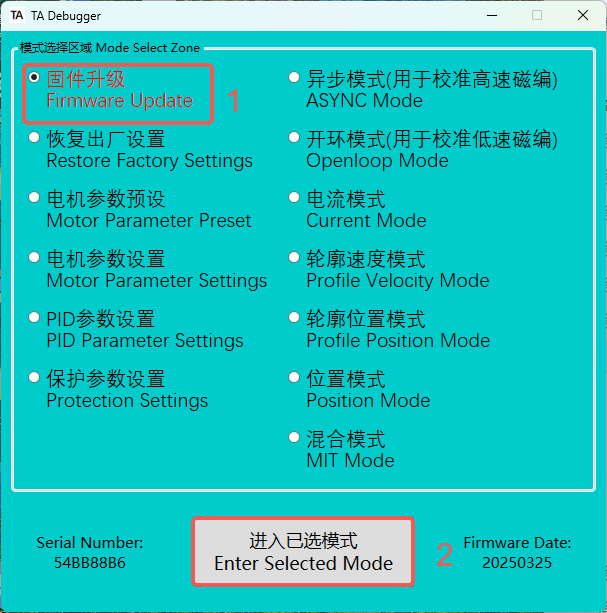
Select Firmware Upgrade Mode.
-
Enter firmware upgrade mode, and the LED indicator will turn solid green.
-
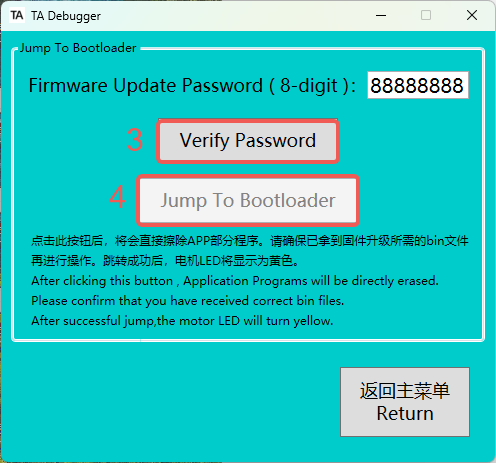
Verify the password. The password is 88888888.
-
Enter to the bootloader.
-
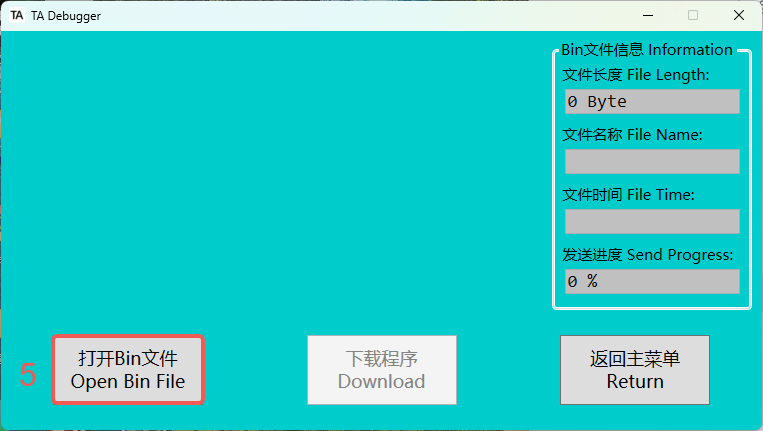
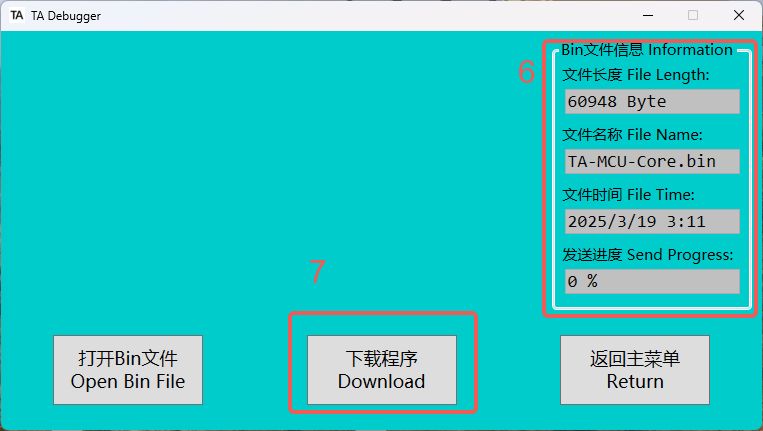
After entering the bootloader, the LED indicator will turn orange. Once the LED status is confirmed to be correct, click to open the Bin file and select the latest version of the Bin file based on the date. The Bin file can be downloaded from the official link or obtained by contacting the relevant technical personnel.
-
After opening the Bin file, please check the file name and date.

-
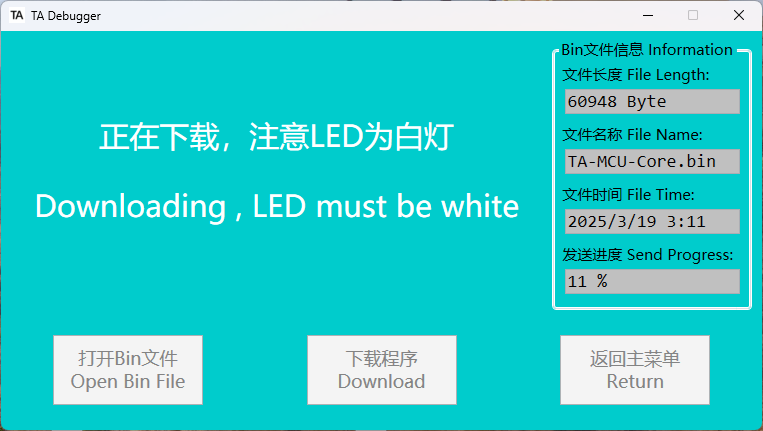
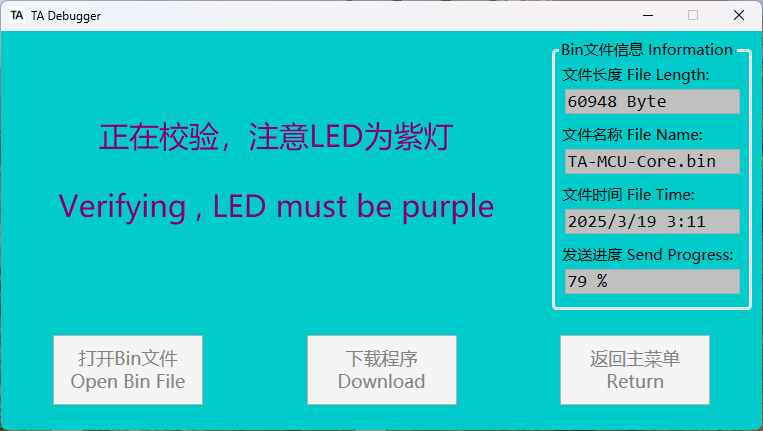
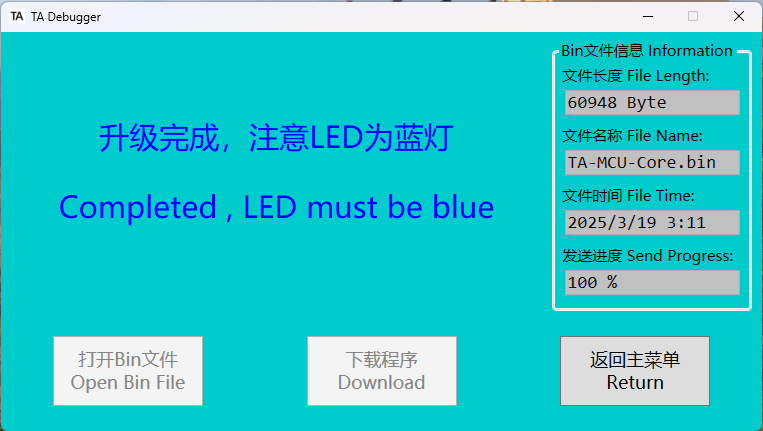
After clicking "Download Program," the downloading process will begin immediately. The progress is indicated by three different LED colors: white represents the downloading process, purple represents verification, and blue indicates the download is complete.
💡Please note that you should observe the LED color on the actuator, not the font color in the software.
-
Once the download is complete, return to the main menu.
Restore Factory Settings
-
If the firmware update causes changes to the original EEPROM/Flash content (there will be instructions in the change.txt file), it will be necessary to perform a factory reset and motor parameter calibration (If the actuator is already installed in the robot arm, the actuator parameters cannot be calibrated. There is also a solution in change.txt).
-
After selecting "Restore Factory Settings," please enter the selected mode. Once entered, the LED indicator will turn solid green.

-
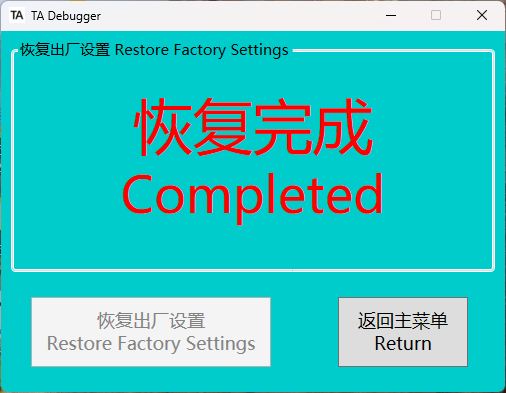
After clicking "Restore Factory Settings," a successful reset will prompt a "Restore Completed" message. If the reset fails, an error message will be displayed. Note that after restoring factory settings, the CAN ID will reset to its default value of
0x05060000. If the previous CAN ID was not0x05060000, you will need to close the software, re-enter the correct CAN ID, and then access the software again.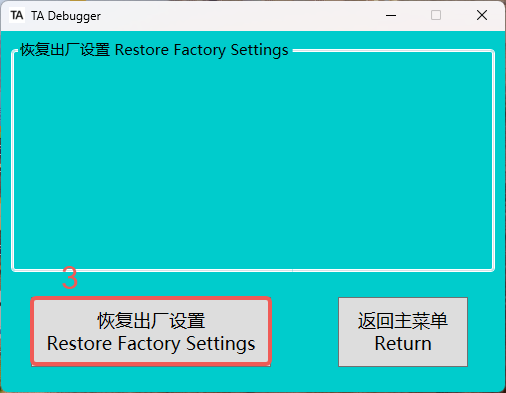
If the reduction ratio of the actuator is 51, you need to manually change the "Reduction ratio numerator" in the "Motor parameter settings" mode to 51 after restoring the factory settings.
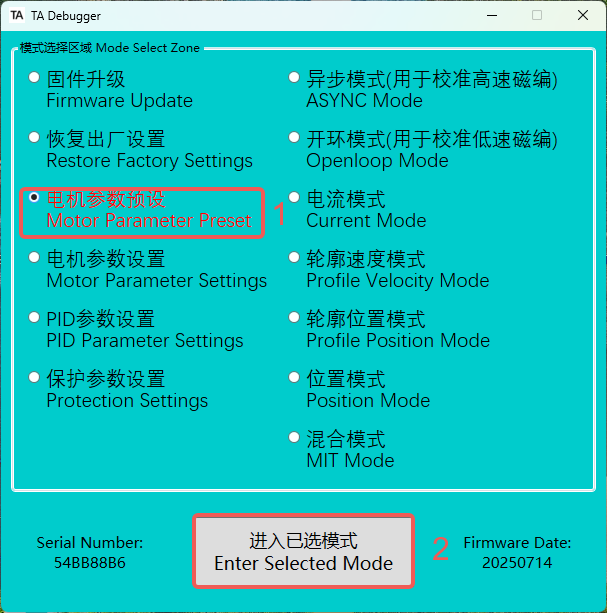
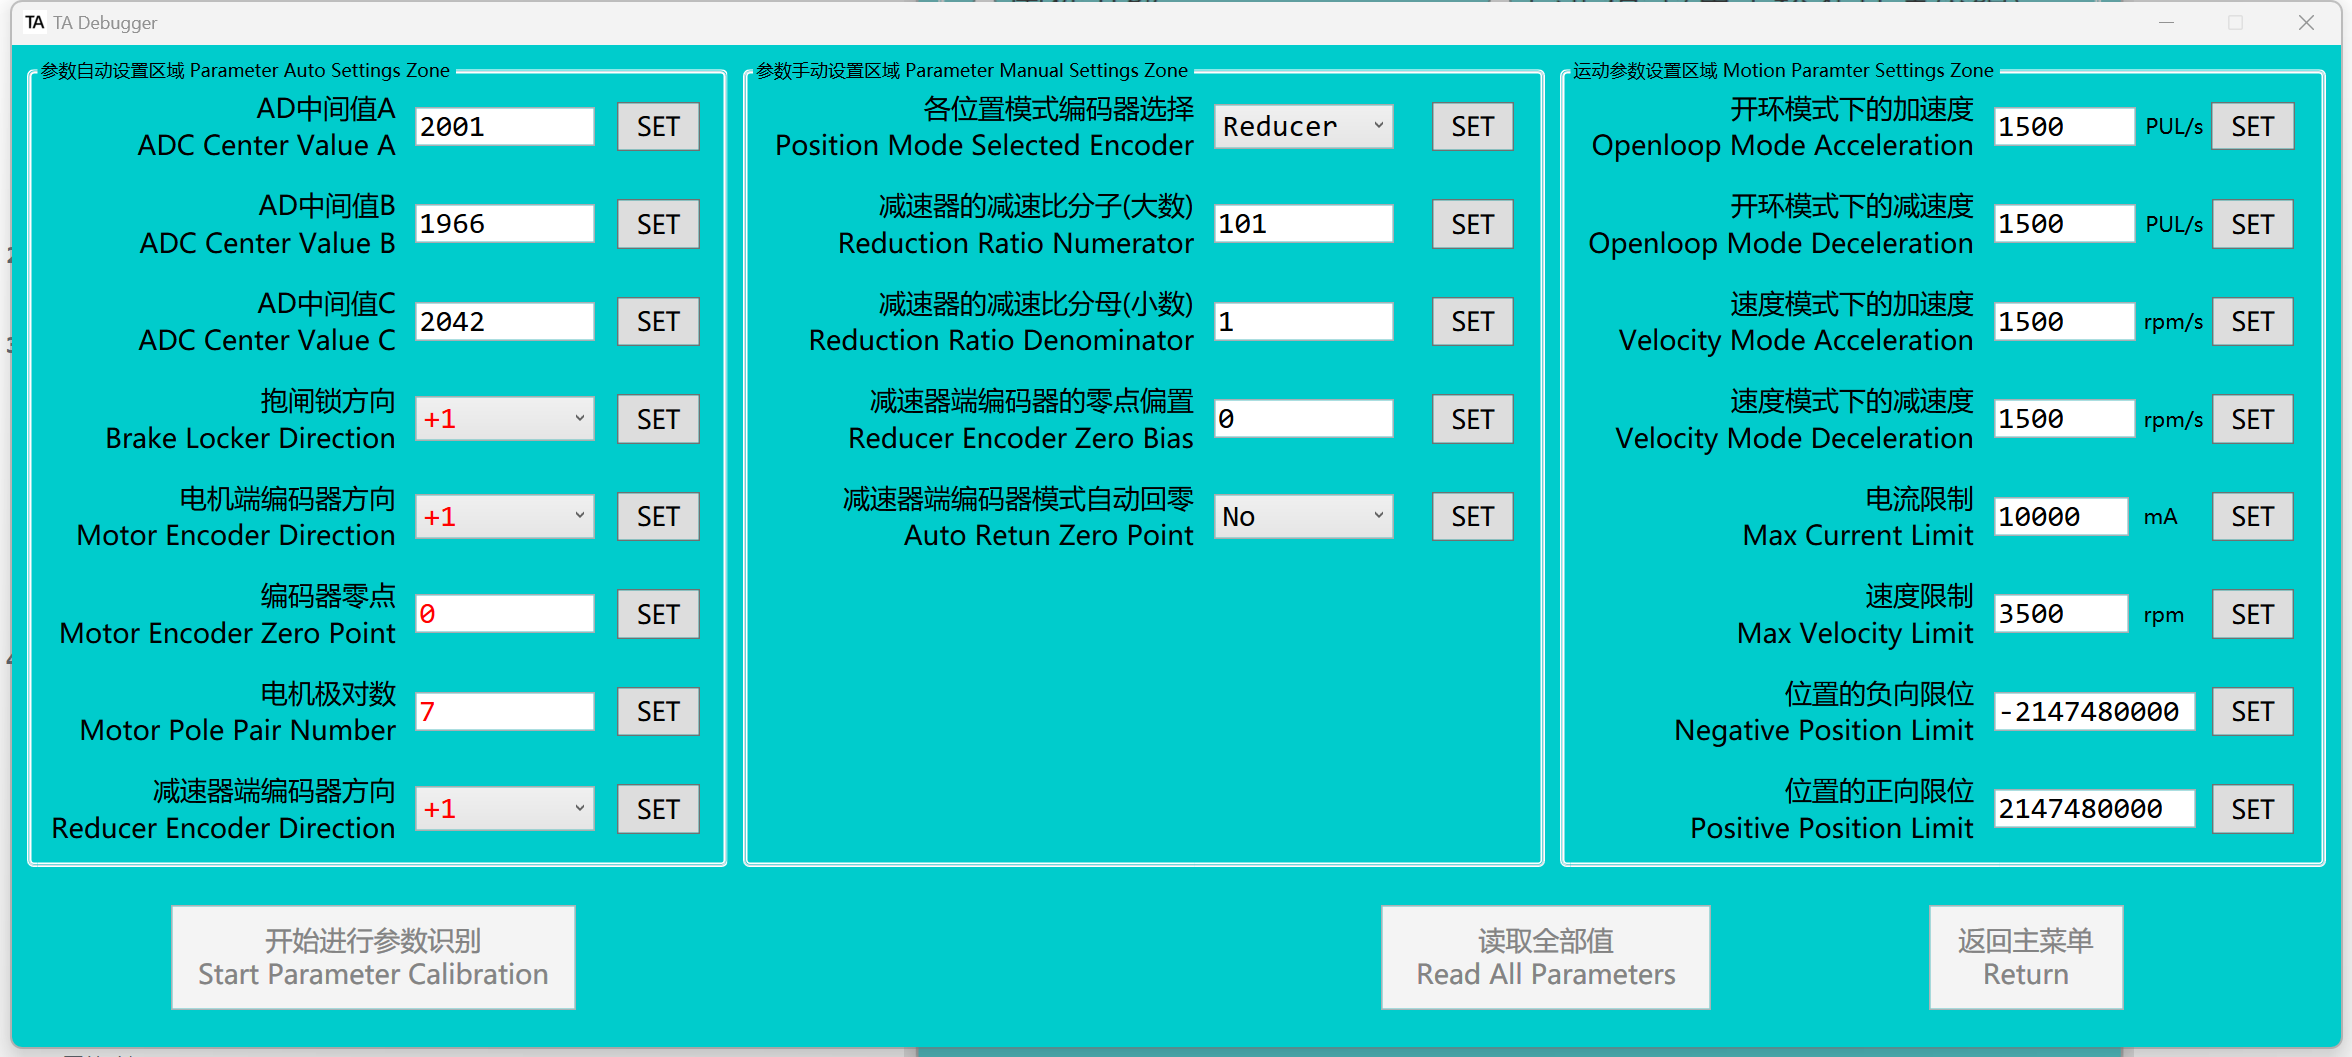
Motor Parameter Calibration
-
After restoring the factory settings, the encoder zero position will change, which may cause the actuator to malfunction. Therefore, it is necessary to enter the motor parameter setting mode to calibrate the motor parameters. As a result, after restoring the factory settings, motor parameter recognition must be performed to recalibrate the encoder zero position.
-
After selecting the motor parameter setting mode, please enter the selected mode. The LED indicator will turn solid green.
-
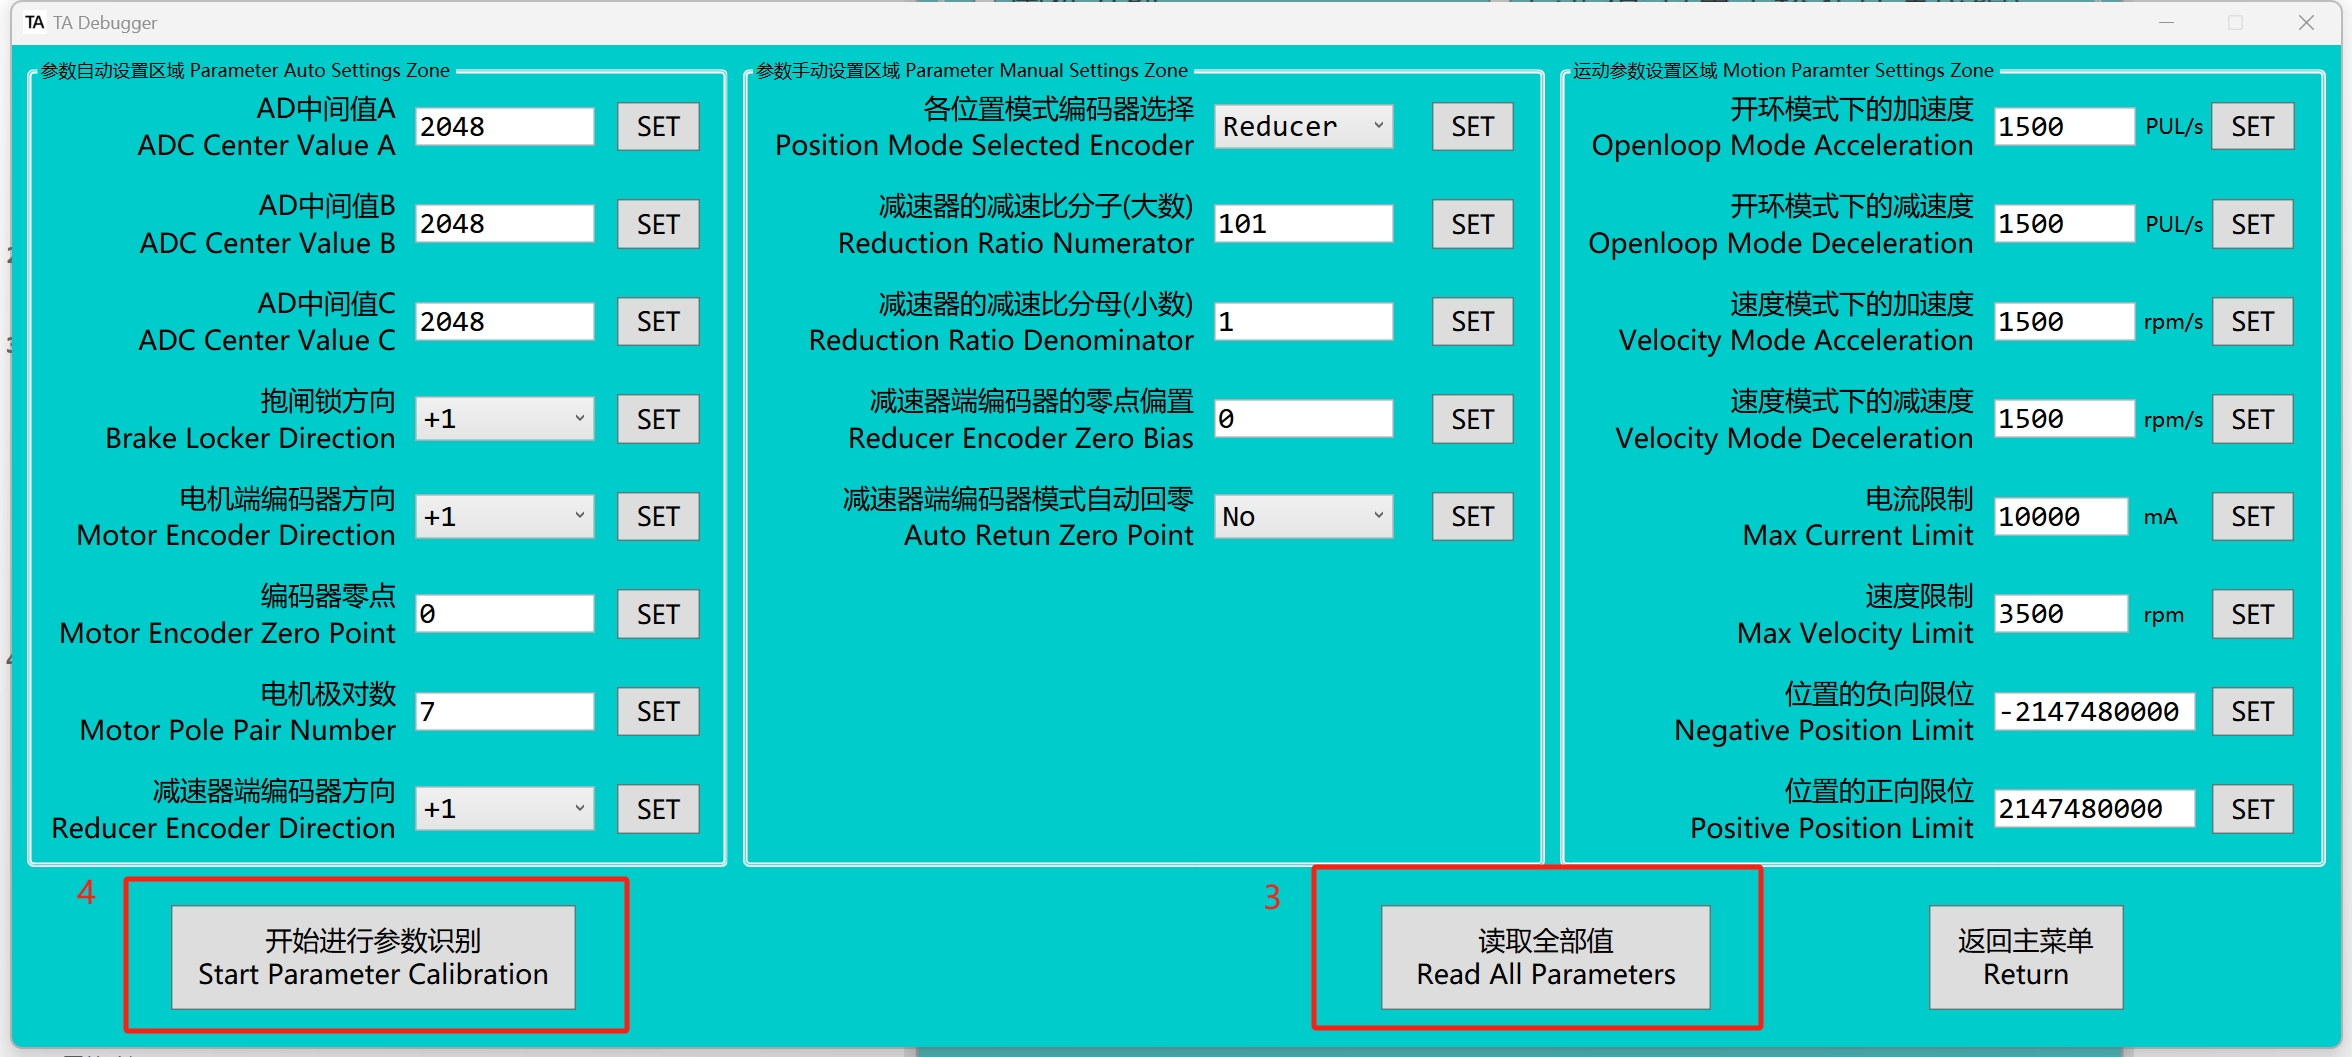
Read all paraments.
-
At this point, ensure the reducer output is unloaded before proceeding with parameter calibration. If there is a load on the output, calibration is likely to fail. Incorrect encoder zero-point calibration will render the actuator non-operational.
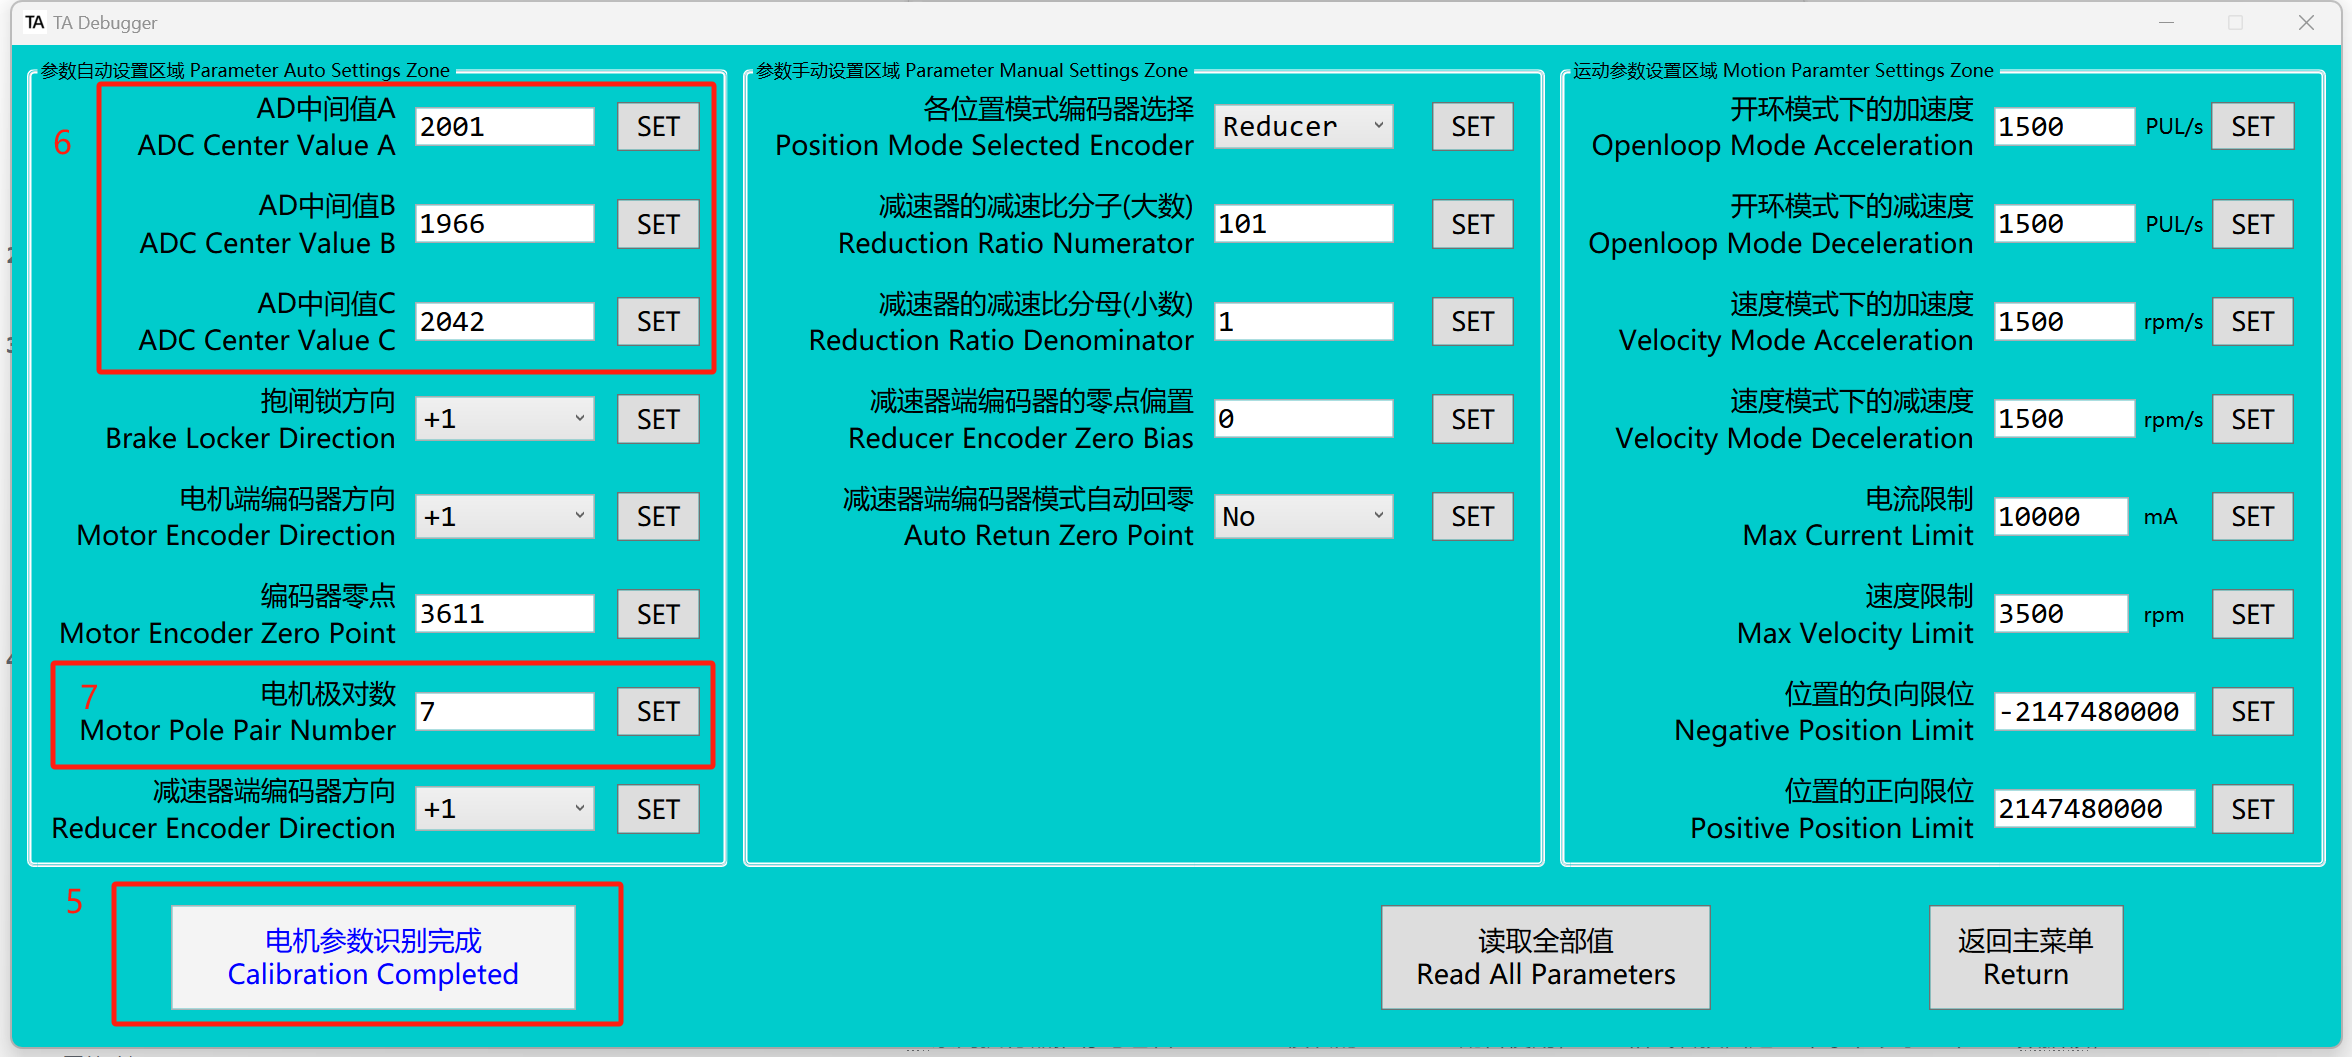
✅The values that have not started recognition will be displayed in red, while the values that have been successfully recognized will be displayed in black.
-
Once the message indicates that the motor parameter calibration is complete, the process is finished.
-
The AD mid-range values A/B/C for TA52 and TA70 should be recognized within the 2048 ± 100 range. If they fall outside this range, it indicates a hardware fault. Please contact the relevant technical personnel for assistance.
-
The motor pole pairs recognized for TA52 should be 7, and for TA70, the pole pairs should be 10. If the values are different, it indicates a hardware fault. Please contact the relevant technical personnel for assistance.